Over New Year, I flew from Europe to Tasmania to build the very first structure on The Brink — a pole shed. I didn’t do it alone, thankfully — my girlfriend joined the madness. She brought skills, patience, and an impressive ability not to murder me when things went sideways. Honestly, I didn’t even know what a pole shed was until she mentioned it, so this whole fiasco is technically her fault.
The schedule was tight but our confidence was high. I’d never built anything bigger than a box, and Fio hadn’t tackled a structure like this either — but fake it till you make it, right? They say confidence is nine-tenths of success… and I think ignorance covers the rest.
From December 26th to January 13th we had one mission: build the shed and install the tech. Somehow we even managed two side trips along the way — proof that blissful delusion can be surprisingly productive. Anyway, this post is about the build, and it starts with poles… holes… and, as it turned out, way too much water.
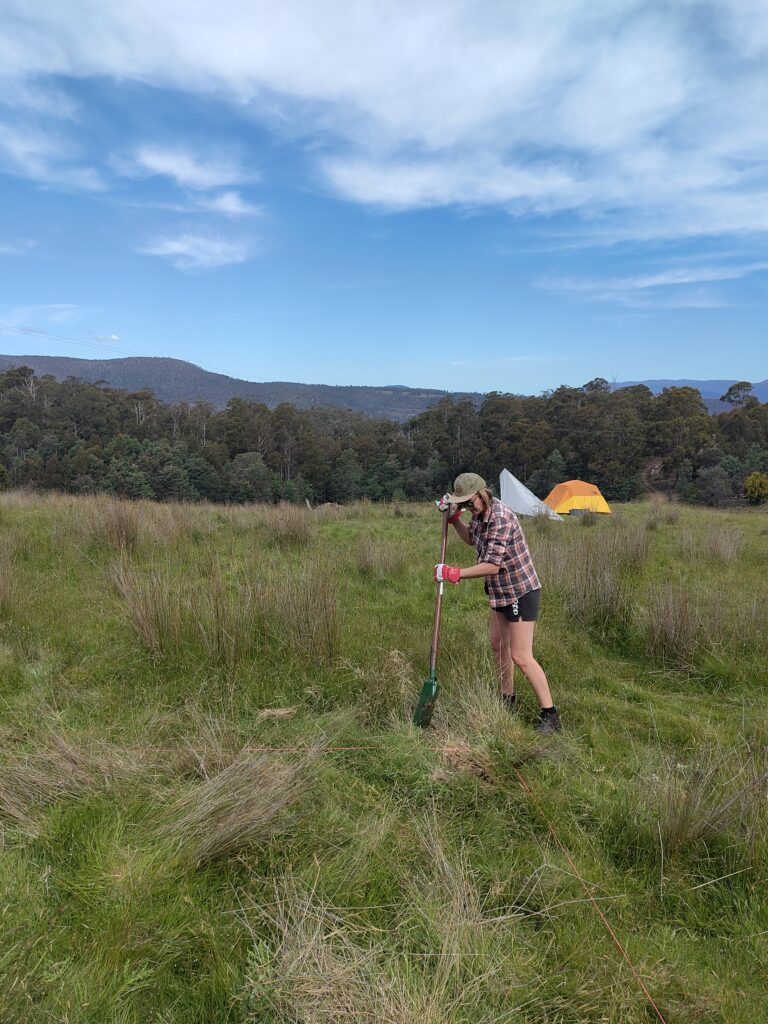
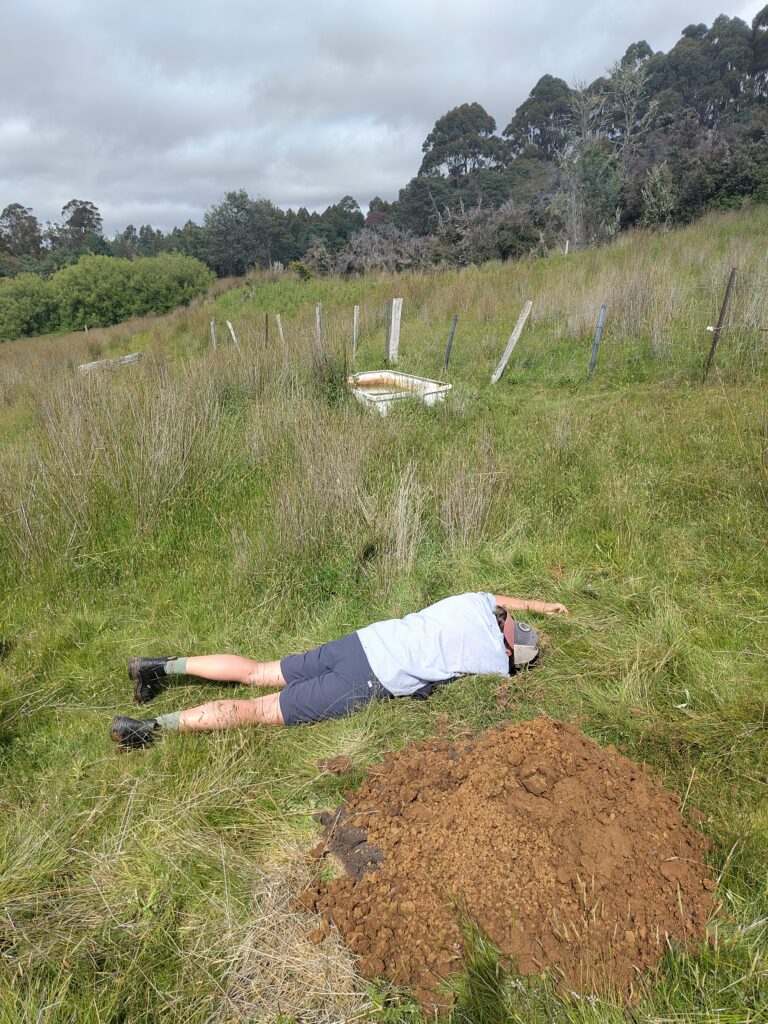
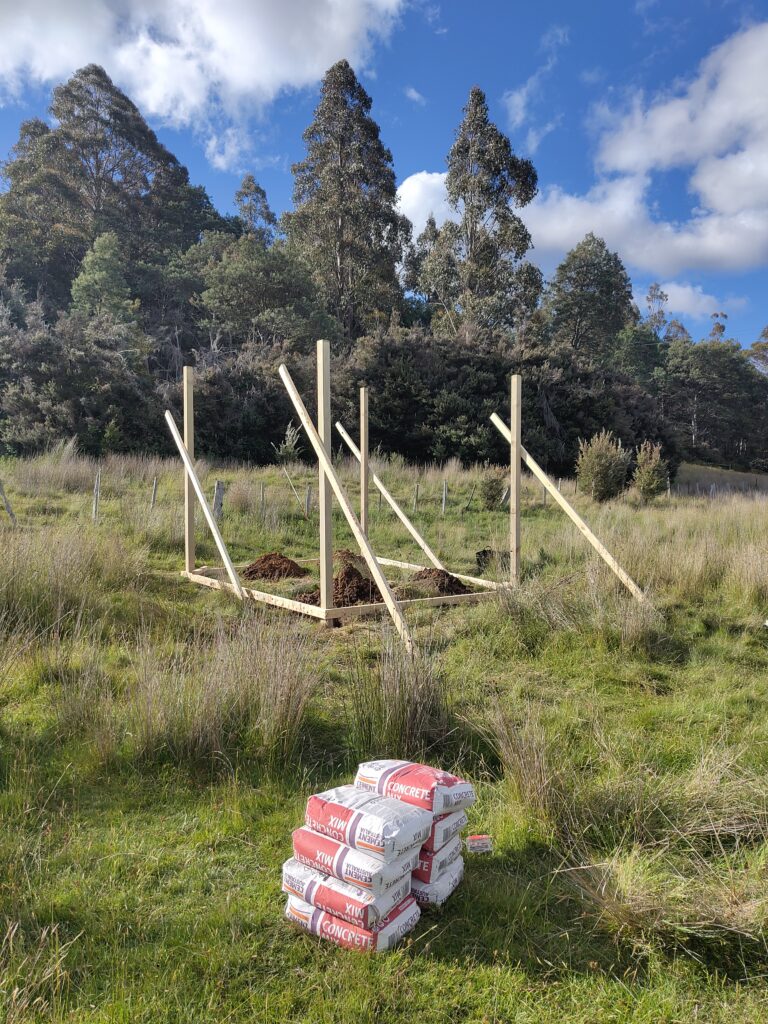
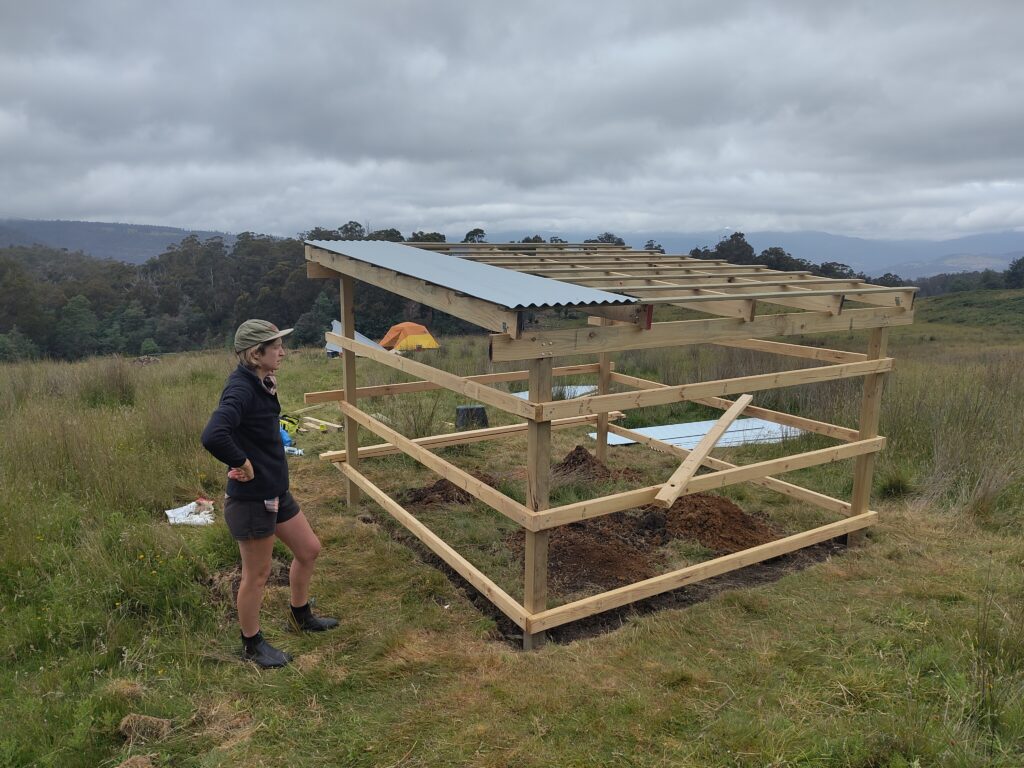
Once we decided on a build site we mapped out the footprint and started digging. The plan was simple: four post holes, 900 mm deep. The ground, however, had other ideas. At 500 mm we hit groundwater. Not ideal for building, great for long term existence (better to have too much water than not enough). Also: clay. Heavy, glue-your-boots-to-the-earth clay.
Our first genius plan was to build a square frame the size of the shed, stand the poles in the corners, and lift the whole thing to tack it in place. With only two people, this turned into a Sisyphus-like activity. Add rising groundwater and we abandoned that plan quickly.
After some strategic worrying and a consultation with the interwebs, we landed on Plan B: dig to 900 mm if possible (clay pool considering), bail out as much water as arms can reach (not much), drop the pole in, then pour dry concrete straight into the swampy mess and let it displace the water while you keep the pole from moving.
We used one framing piece to keep the first two poles aligned, then promptly forgot how we did it and free‑styled the next two with temp supports. By some miracle, they all ended up straight.
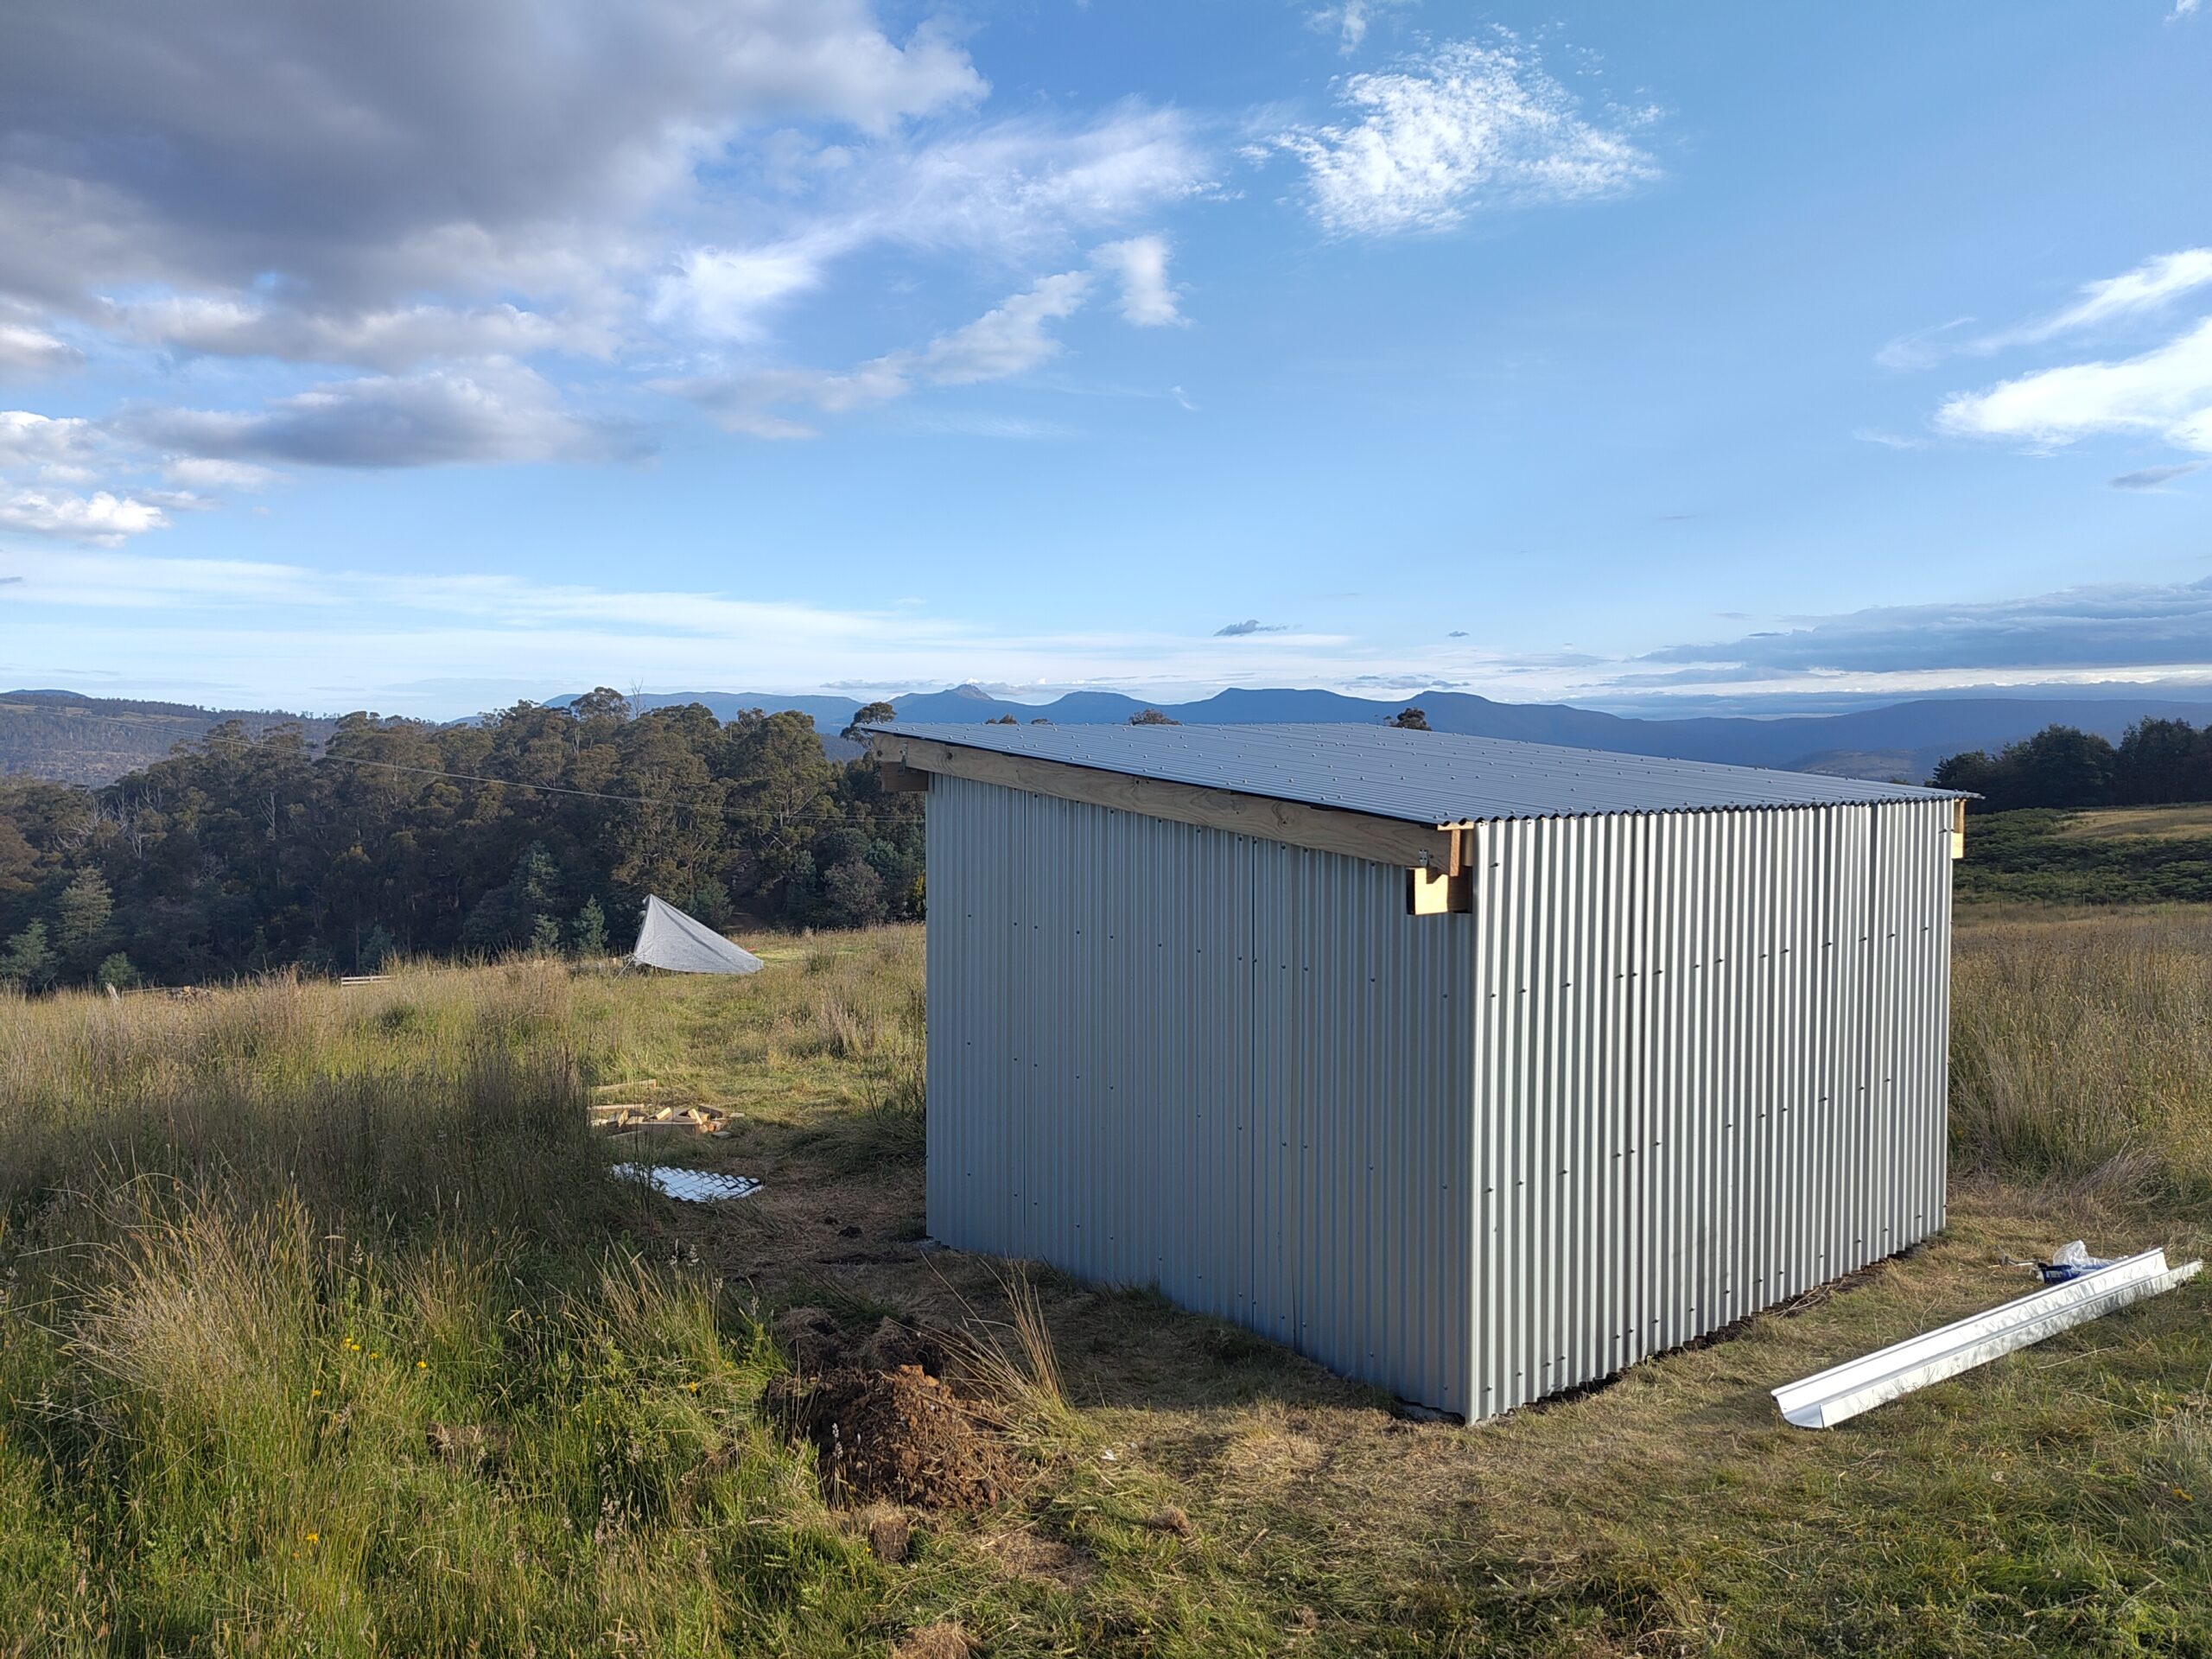
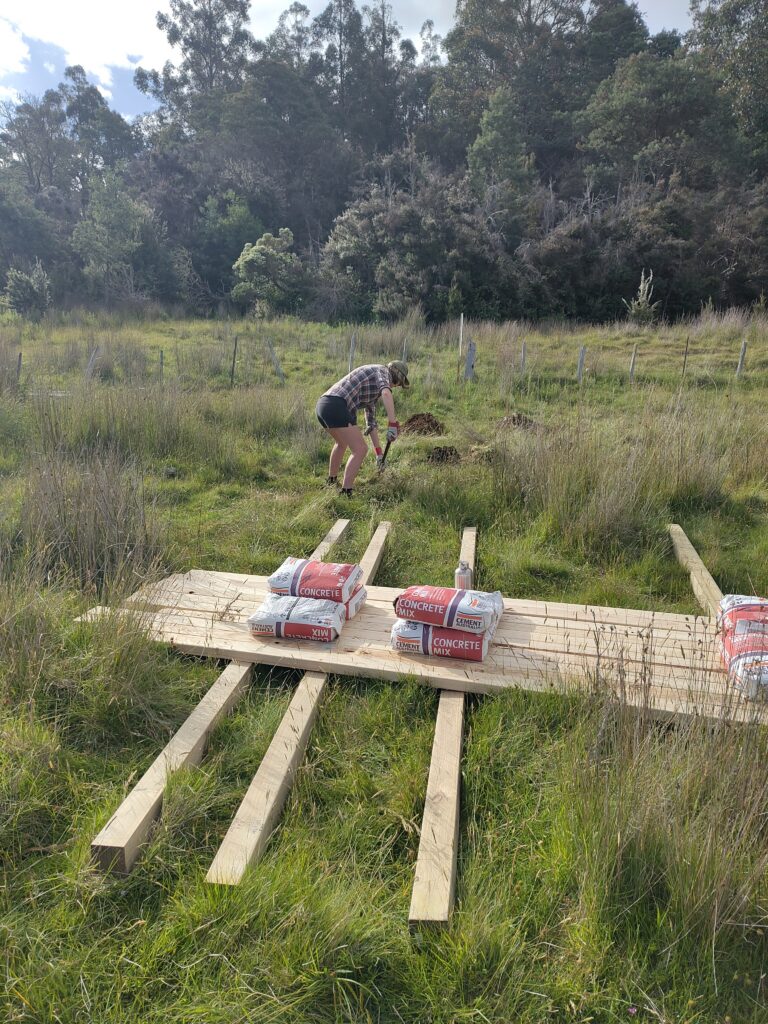
Two days and eight bags of concrete later, we had four poles sticking out of the ground—hopefully secure enough to hold up a shed and not just our optimism. Time will tell. Either the shed will be standing the next time we visit… or not.
By this stage the holes were only half (okay, a quarter) full of concrete, so we ended up feeding them another eight bags—sixteen in total before the end of the build. Twice what we planned.
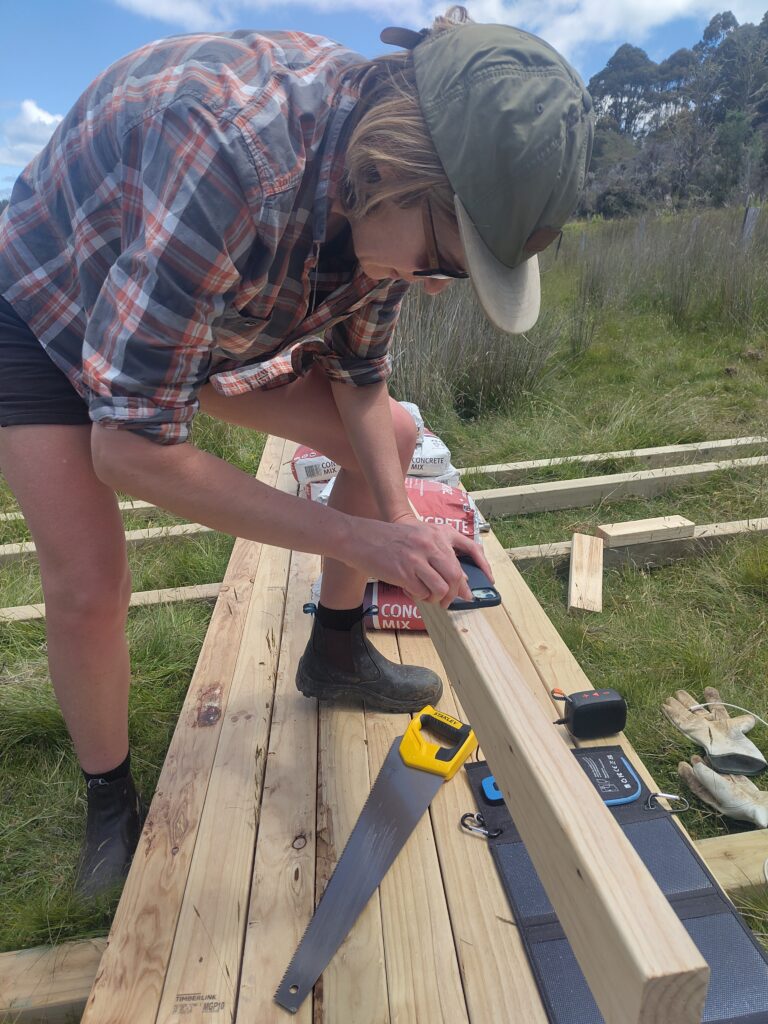
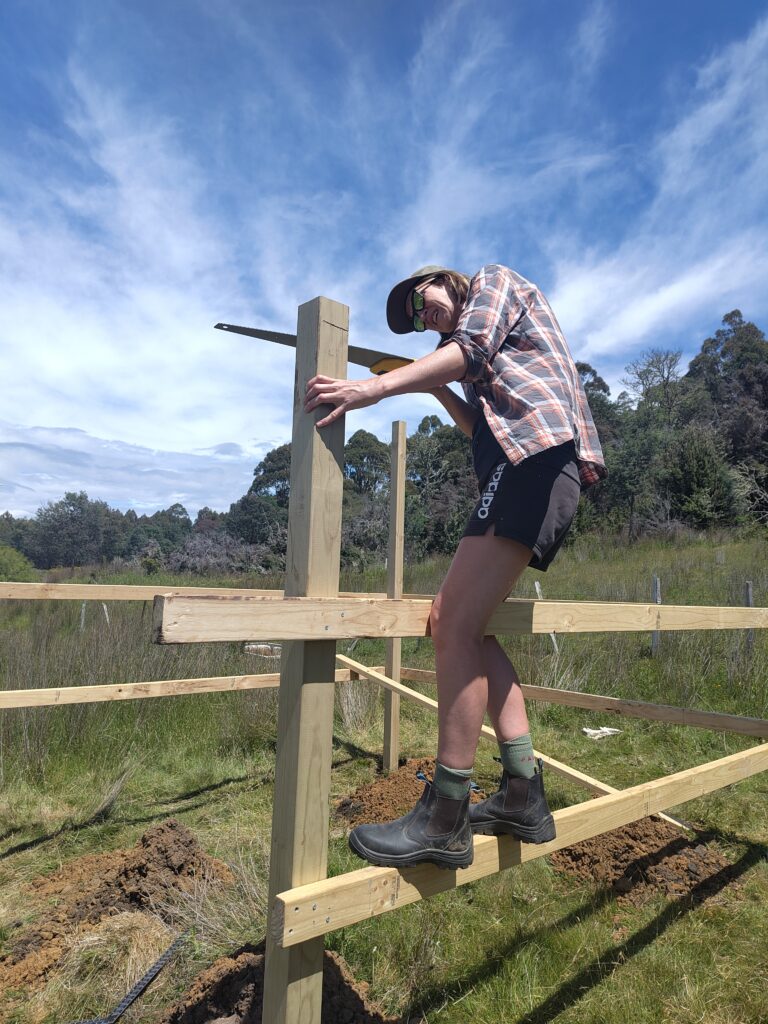
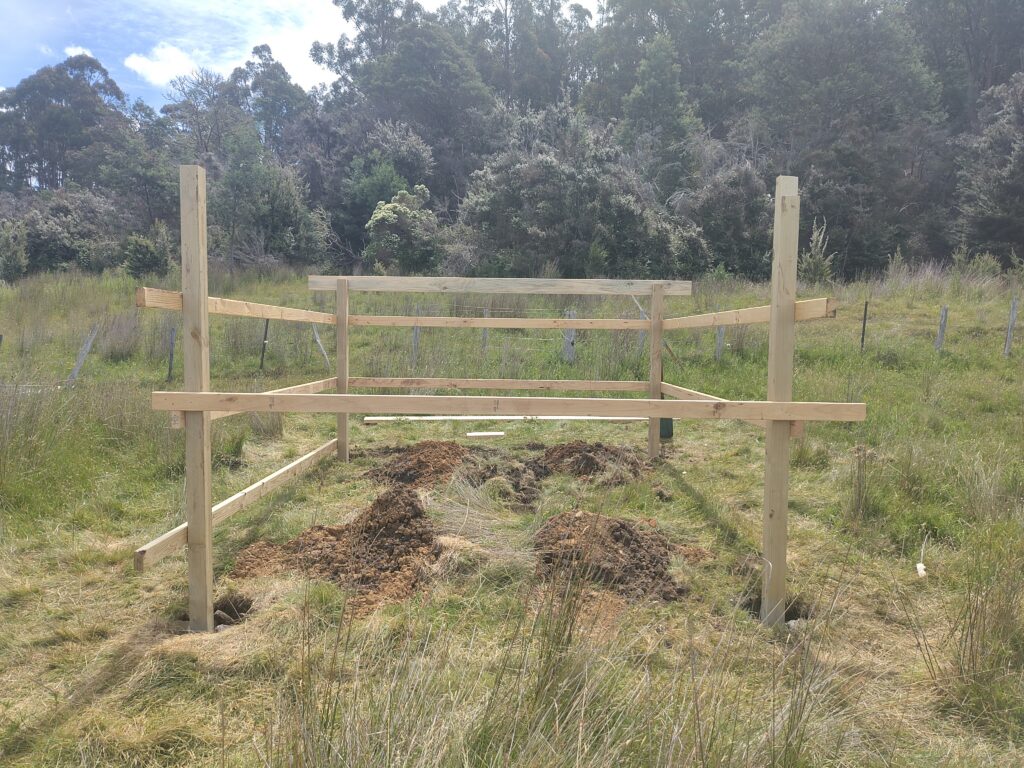
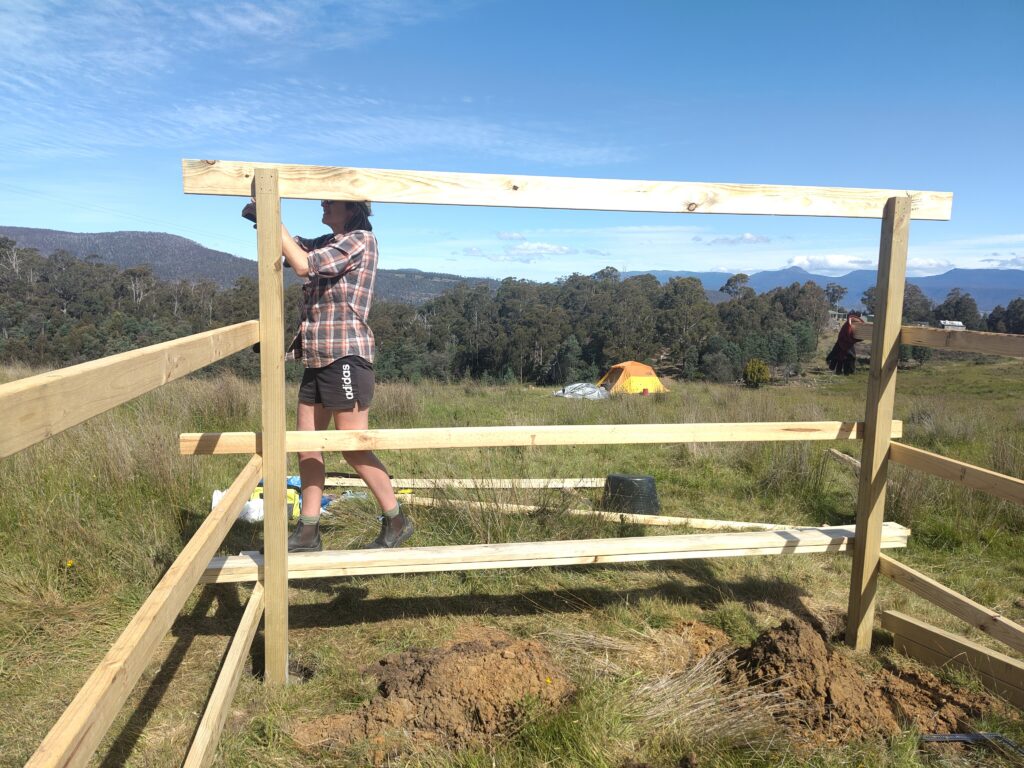
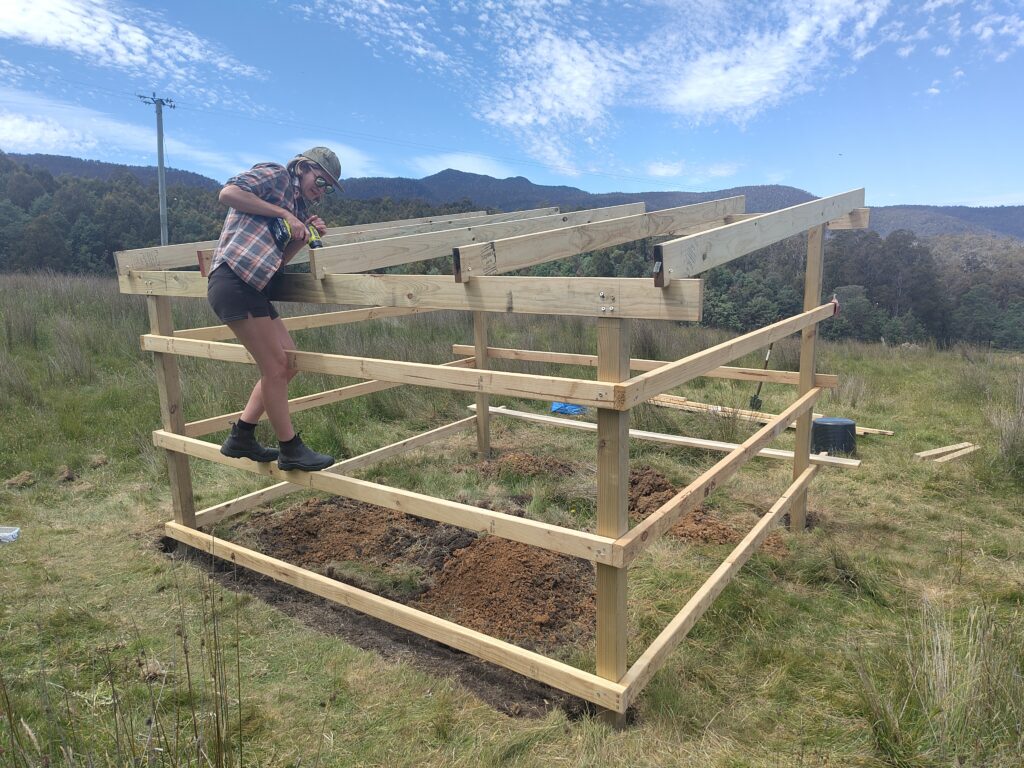
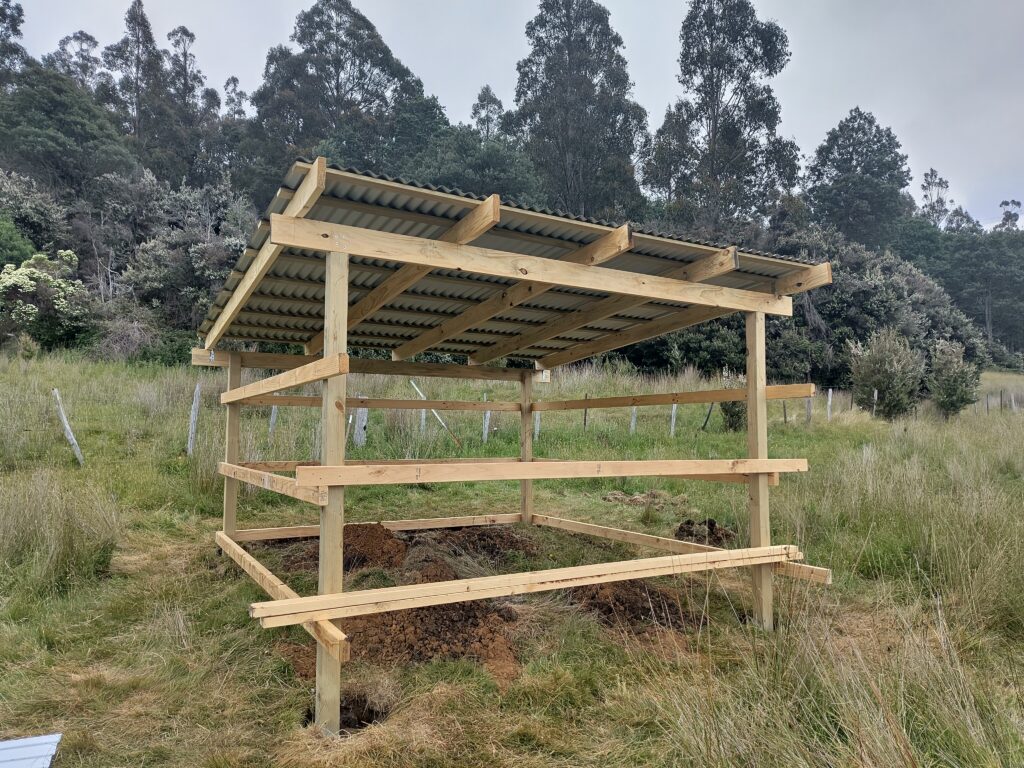
We waited 48 hours for everything to set, which was the perfect excuse to escape for a shower and some sightseeing in Port Arthur before the next round. Framing was pretty straightforward and only took about a day:
- screw in the framing on three sides (we added extra at the front for security and footholds)
- cut the poles down so the roof slopes a neat ~5 degrees – carve lap joints (or whatever they’re called) for the front and back beams
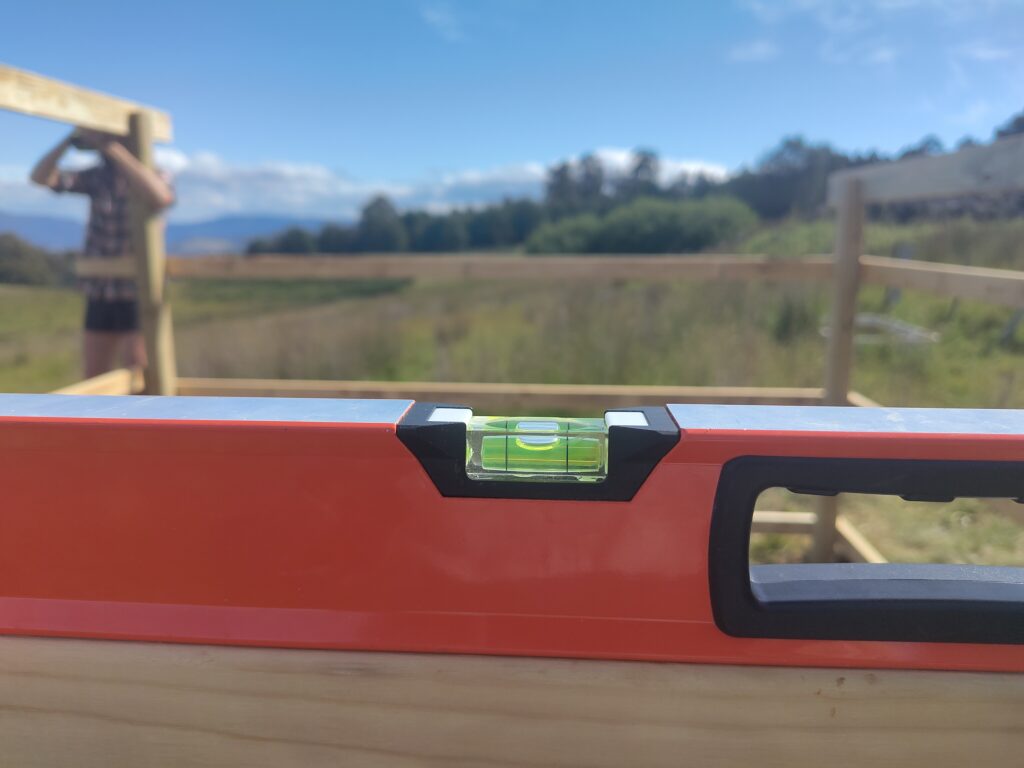
- make everything straight ✔️
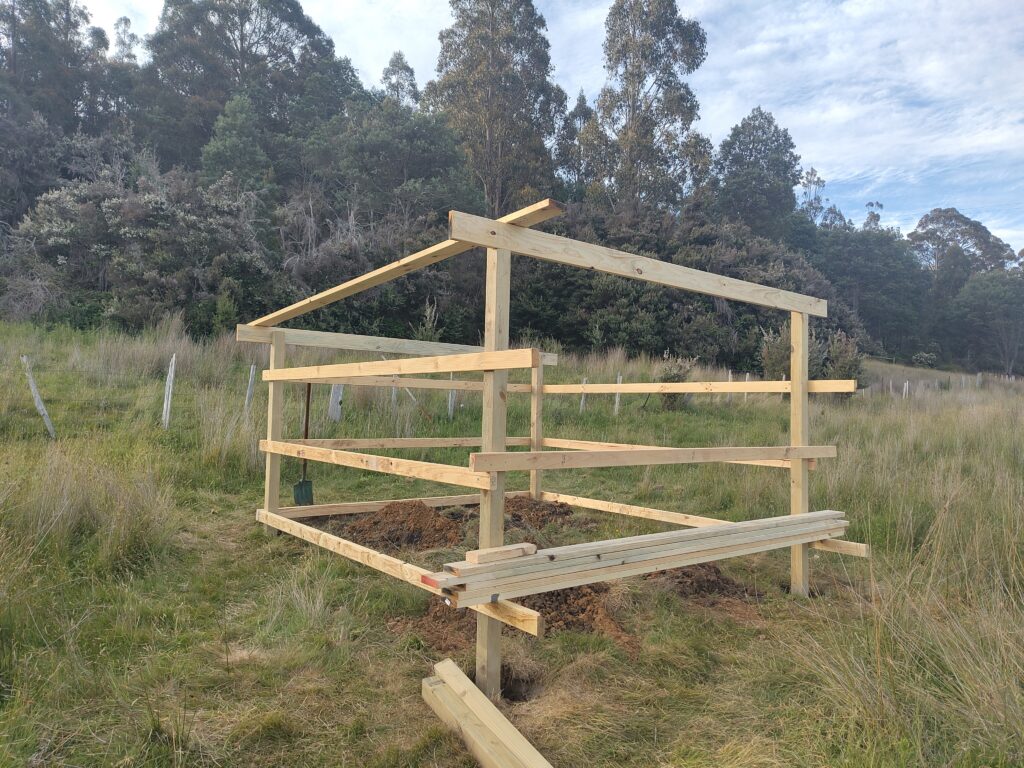
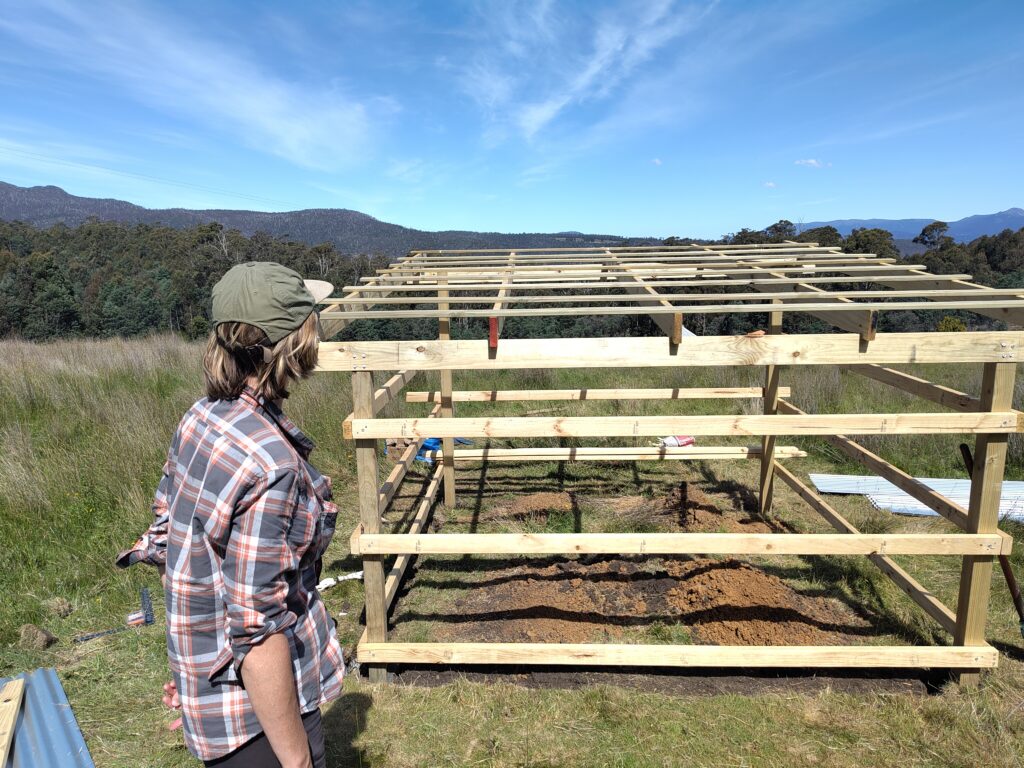
Now the roof…
Easily the hardest part of the whole build. Thank god I had Fio, because doing this solo would’ve ended with me living inside an open frame.
Lesson #1: fact check hardware store advice. The guy said 900 mm rafter spacing was fine… while selling us corrugated sheets that were 764 mm wide. You can imagine how thoroughly we did not connect those dots.
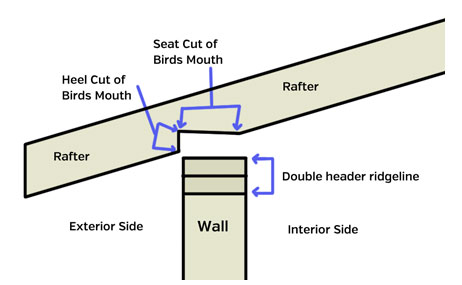
But even before installation, we had to figure out the Birdsmouth cut for the rafters. Every video involved formulas, angles, and terminology that changed depending on the video you were watching. Our measurements resulted in removing about 3 mm of wood – absolutely not enough.
Fio eventually ditched the math and invented the “hold it, scribe it, lop it off” technique for a 20 mm mouth. Good enough, zero equations. No idea what gradient the roof is – somewhere around 5 degrees.
Originally we planned 600 mm rafter spacing, but we followed the 900 mm advice to save money. Then realised iron does not, in fact, float in mid‑air. This was followed by an extensive amount of swearing until Fio moved two rafters back to 600 mm, which required removing screws and stripping heads. More swearing. Then we discovered the iron sagged anyway, even more swearing.
At this point, spirits were low, vocab was spicy, and camera use dropped to zero—except for one photo.
The next morning (and a bottle of wine later), we went back to the hardware store. The guy realised his mistake, apologised, and another bloke (older and therefore wiser) casually says, “Just add battens. You should’ve had em anyway.” Nine treated battens later—an unplanned purchase—we suddenly had a sturdy roof that would hold the iron and even kept the rafters at 900 mm saving on one less than planned. Winning.
The hardware-store guy obviously felt guilty about the whole “let’s-space-the-rafters-wrong” advice, because when the corrugated iron arrived, so did extra wood for purlins—free of charge. Apology accepted; lesson learned.
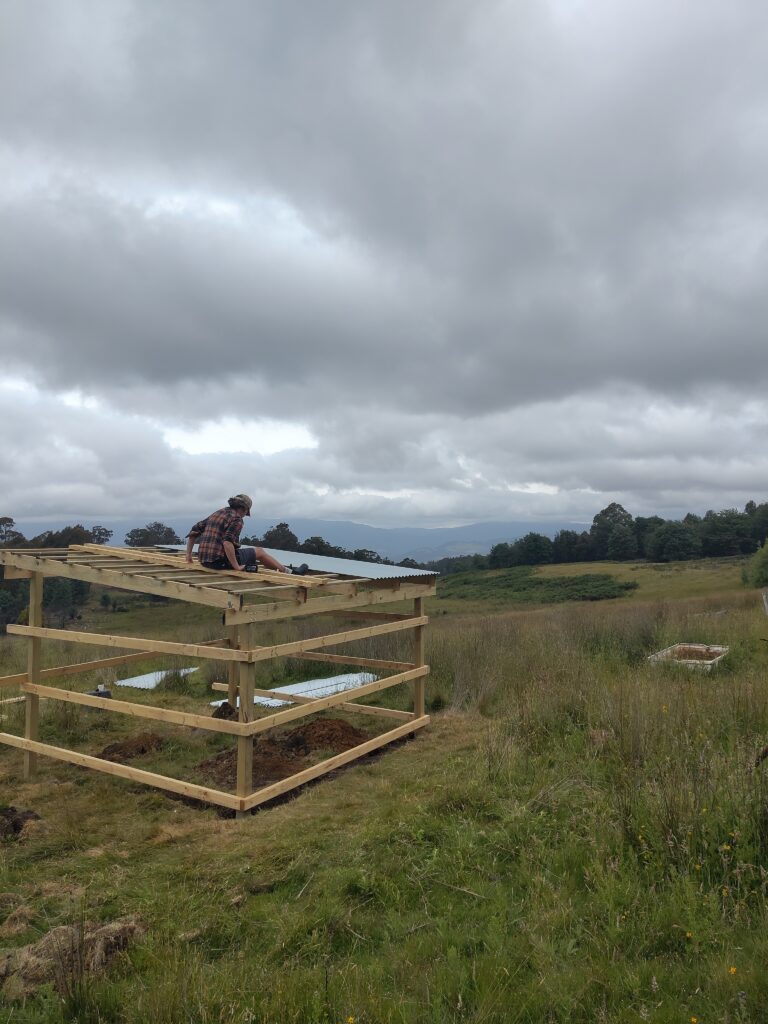
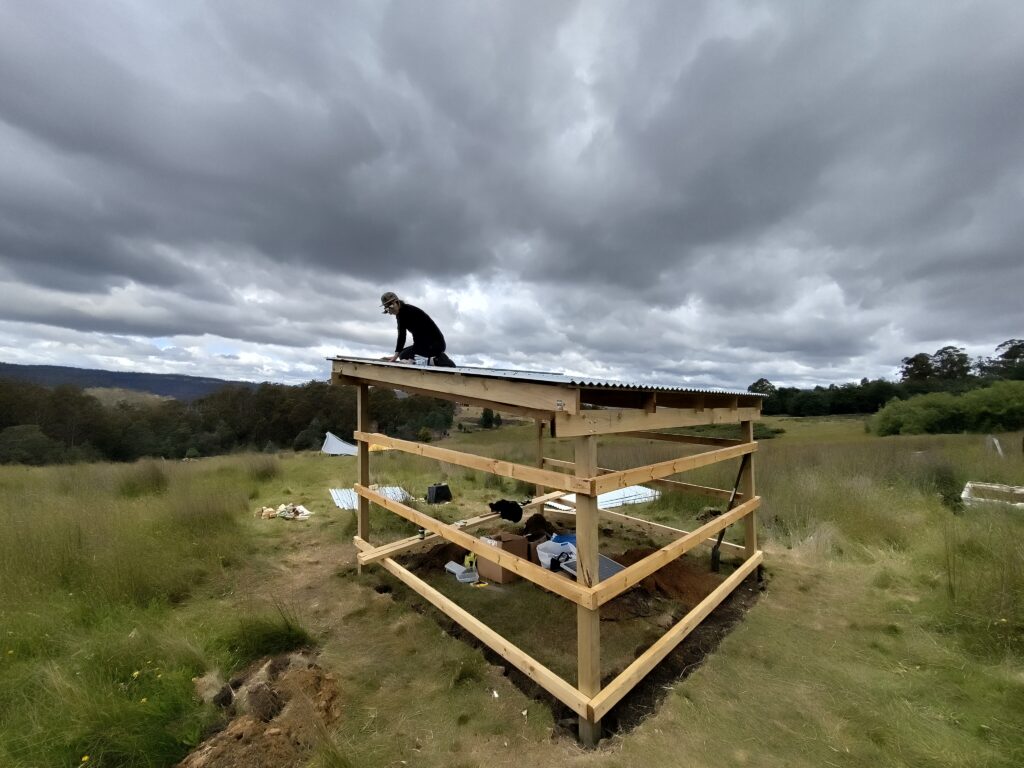
Once the rafters, battens, and gifted purlins were finally in place, we could lay the iron on top and square everything up. It took ages, was somewhat infuriating, and involved a lot of moving the iron back and forth, but in the end… it was square.
By this time Fio had a few hours of paying work to do, so we headed into town—pub, power outlet, comfy chairs. High winds were forecast for the next day, but we figured the roof would be fine sitting there unsecured for a few hours.
It was not fine.
We came back to find the roof on the ground and one sheet still clinging to the shed. Getting it back on and square—while the weather rolled in and the daylight disappeared—was an exercise in patience we didn’t ask for. After a long, slow, infuriating battle, Fio delivered one last furious shove at the front and bang—perfectly square again.
Lesson #2: Do not go to the pub without securing the roof
Then it was head torches on and screwing it down till almost midnight to ensure it was secure enough for the winds the next day, which of course did not eventuate.
One final screw you from the shed was that the screws didn’t self tap into the iron, so every single hole required first a pilot hole then the screw. We had one tiny battery powered drill. Don’t think I’ve heard Fio swear so much.
The next morning was about finishing the roof ensuring enough screws were in and not even two hours later this happened.
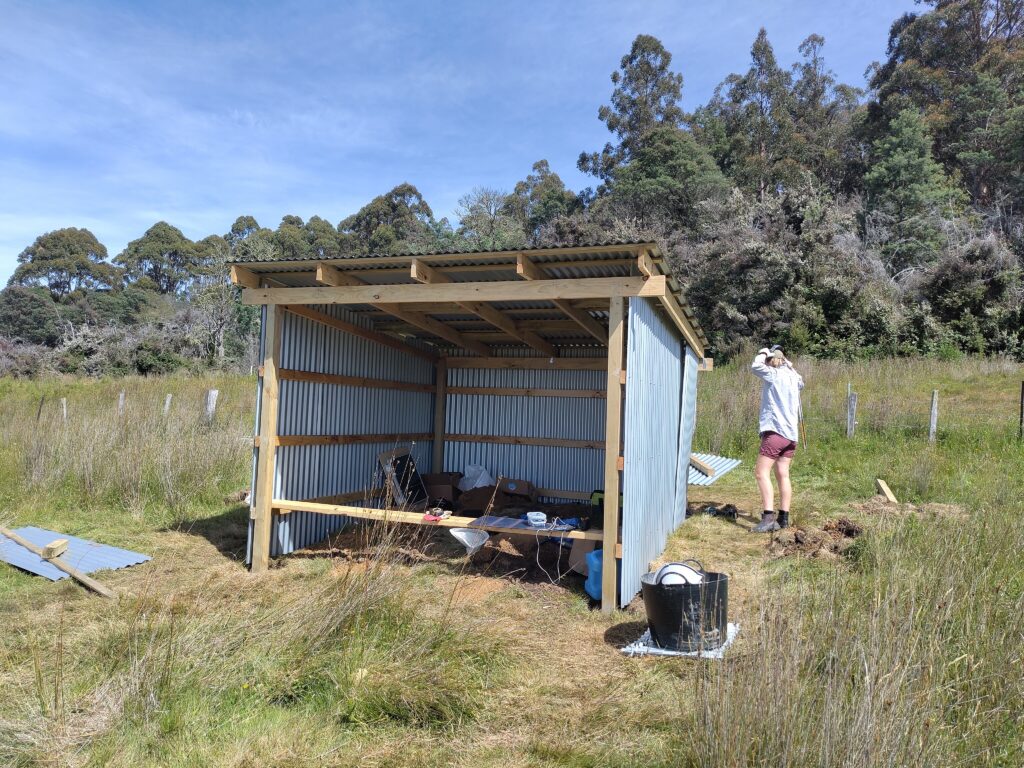
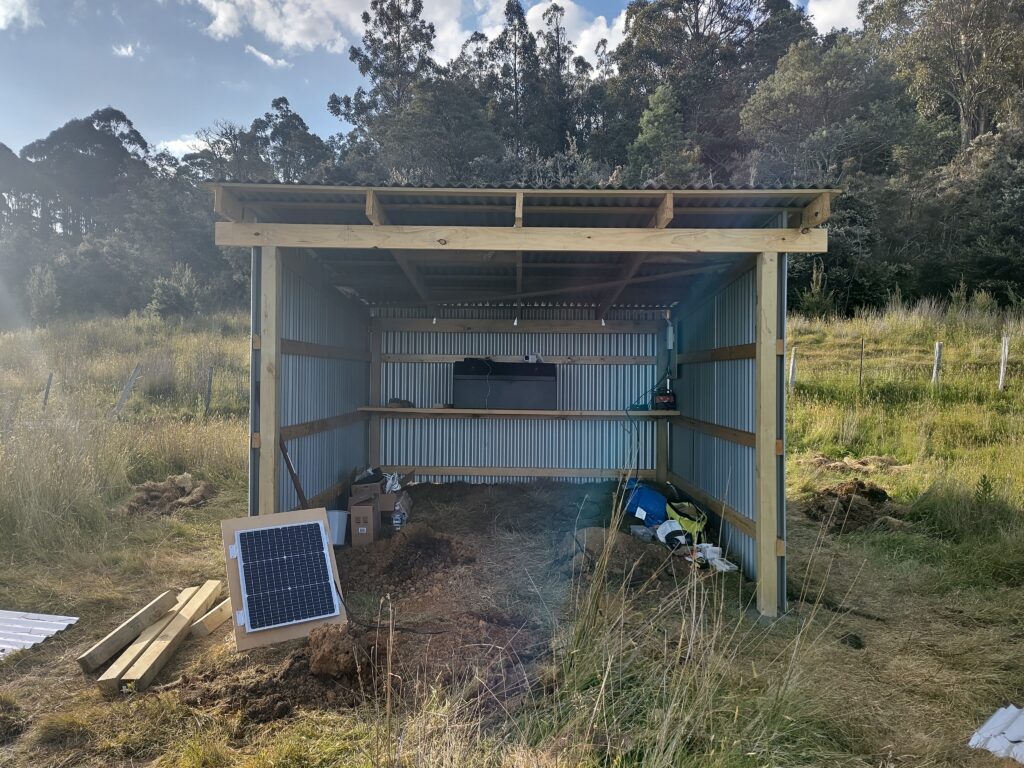
Then we had to double down on things as we had only a two days left and I hadn’t even started the tech setup. Fio focused on the iron – cutting and fitting. I got on with the tech which didn’t go smoothly at all – that’s for another post.
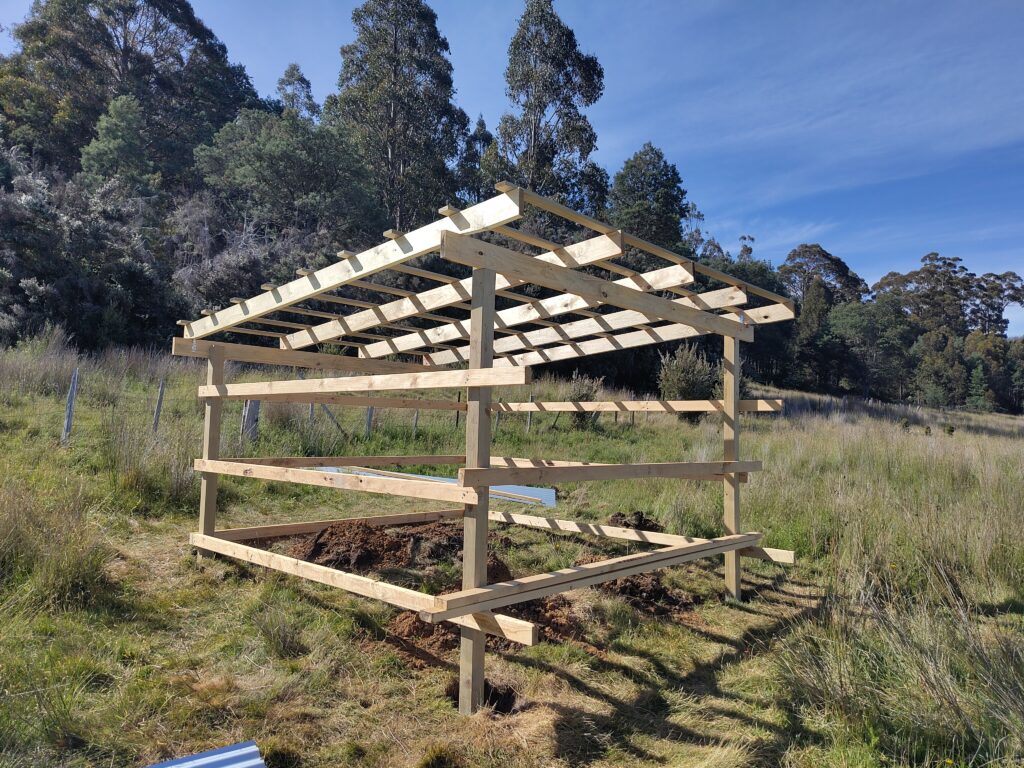
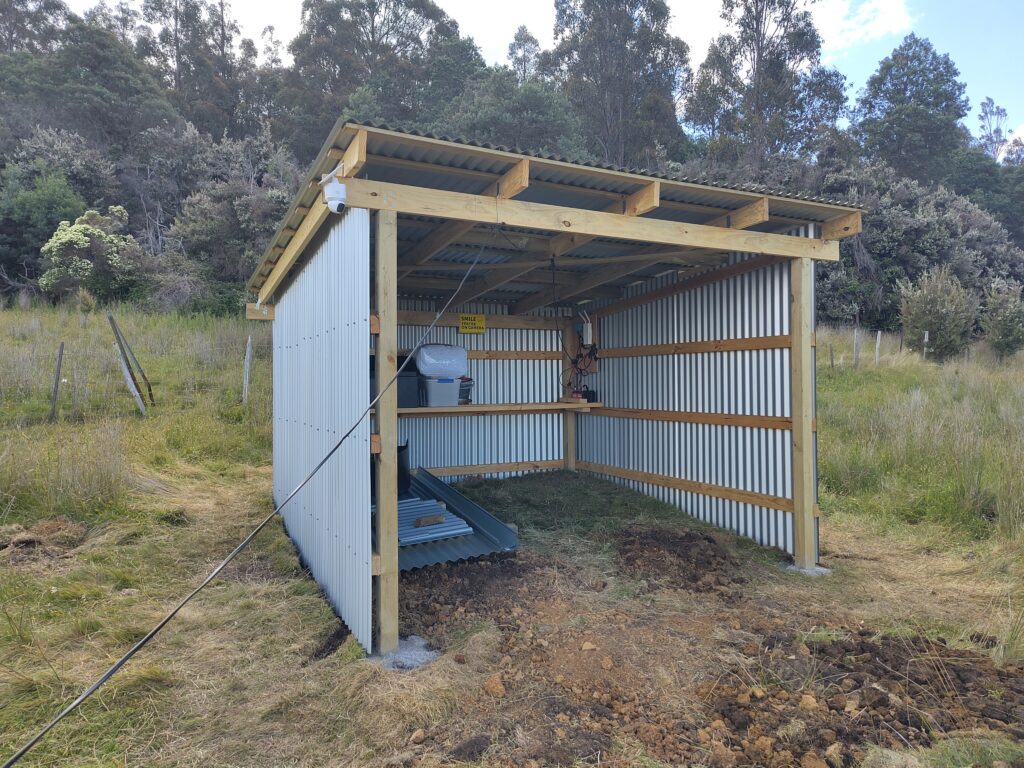
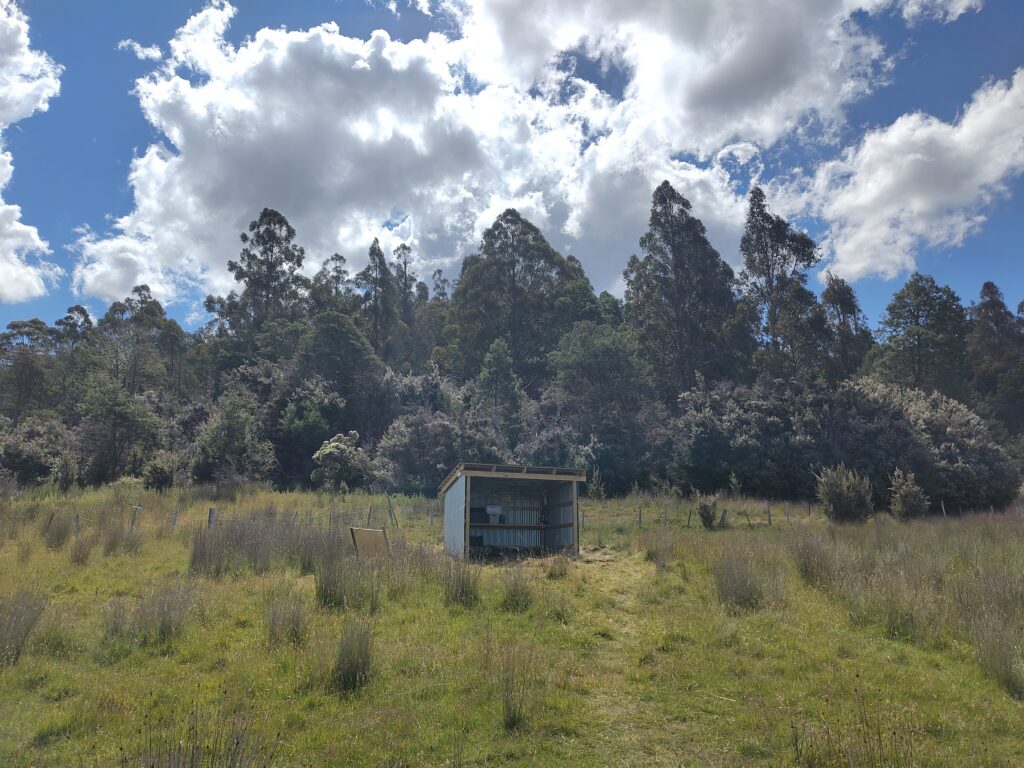
Anyway here’s the finished product. Couldn’t be prouder of what we got done in roughly six days of building and zero experience!

February 13, 2026
@writings fuckin awesome! You're hired. Both of you 😘
Remote Reply
Original Comment URL
Your Profile
Why do I need to enter my profile?
This site is part of the ⁂ open social web, a network of interconnected social platforms (like Mastodon, Pixelfed, Friendica, and others). Unlike centralized social media, your account lives on a platform of your choice, and you can interact with people across different platforms.
By entering your profile, we can send you to your account where you can complete this action.
February 13, 2026
anytime for you!
February 13, 2026
@writings epic write up and mad props on the roof holding up in the rain! I remember my dad building our house, bit by bit, room by room, and the pride when we went back 50 years later to see it still standing. I hope yours keeps just as well.
Not heard of the water displacement method for dealing with concrete before, nifty trick.
Remote Reply
Original Comment URL
Your Profile
Why do I need to enter my profile?
This site is part of the ⁂ open social web, a network of interconnected social platforms (like Mastodon, Pixelfed, Friendica, and others). Unlike centralized social media, your account lives on a platform of your choice, and you can interact with people across different platforms.
By entering your profile, we can send you to your account where you can complete this action.
February 13, 2026
thanks! yeh this is practice for the tiny house that will come in a few years. like you said bit by bit, room by room. prob gonna tackle an outhouse next with compost toilet and deck to put a large tent on then it will be absolutely livable till the house is built. but slowly slowly and lots more lessons to learn! we’re hoping the water displacement worked – hard to tell cause wet concrete won’t set but you can’t see down the hole so won’t really know till the shed either blows away or doesn’t so let’s see haha
February 17, 2026
[…] read the post about building the she if you haven’t already done so to set the context of this […]
March 17, 2026
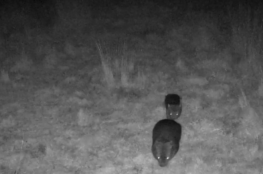
[…] We built the shed to store the tech: mostly a camera to spy on whoever wanders past—pademelons, possums, wallabies—and to glare menacingly at any would‑be thieves. If you want the saga of actually building the shed, that’s over here. […]